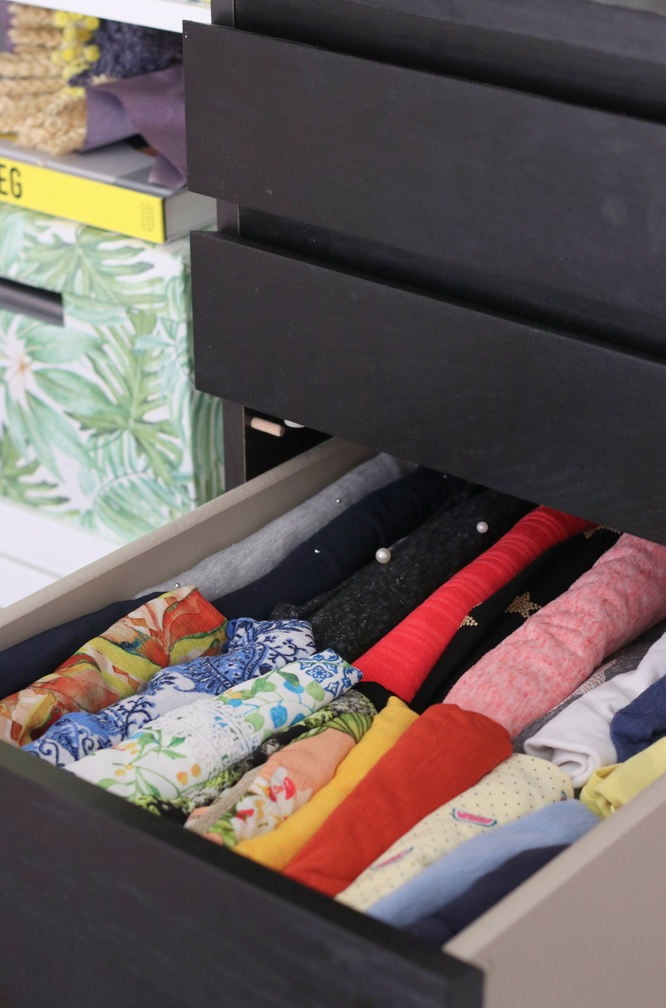
Over the weekend, I took a notion to go through my tops and organise them, using the Marie Kondo folding technique. And that’s all I was aiming to do. However, this lead to the mother of all clear outs which involved me ripping the old wallpaper from inside of my wardrobe Then I decided I needed to paint the interior of the wardrobe, before sorting through my Kallax units in my bedroom. And all because it was a gorgeous sunny day and I wanted to get my spring/summer tops ready for action. Two non-stop days later and I’m exhausted but so organised!
For the last five years or so, I’ve been folding my tops using the Marie Kondo folding technique and while the rest of my bedroom can be a mess, those two drawers are always the tidiest in the house! This is a system that works for me, given the limited storage I have in my room and if I had more drawers, I’d be doing the same with them. I have a Malm unit from Ikea that houses some of my clothes and rather than having the tops laying flat where I can only see whichever one is on the top, I fold them up using the Marie Kondo folding method and I can see them all at once.

I first learned how to do this when I bought Marie’s book, and it really is life changing! Every few months I go through my clothes and donate anything that doesn’t bring me joy, so I always love all of my clothes. Now I mightn’t have the folding technique down 100%, but that’s ok, this works for me. There are so many videos on YouTube showing how to do this a lot more accurately than I’m about to show you.
When organising my tops the other day, it became apparent the I am fond of a stripe. And now they’re all lined up side by side, ready for action. The idea is to fold your items up so that they’re all the same width as each other, and when they’re stacked side by side, they look uniform. I’ve a few tops like the one below that have designs on the front and are plain at the back and I want to be able to see the design when it’s in the drawer so I know what I’m reaching for.
I start by placing the top face down (usually on my bed) and smooth it out.
Taking one side, I fold it inwards, usually about a third of the width of the top, but you can judge for yourself depending on how you want it all to look when it’s done.
I fold the second side across and smooth it all out again.
Starting from the bottom of the top, I fold upwards. I can usually tell how many folds something will need so that it looks all even in the drawer. Marie folds the item in half and then half again, but I’ve just gotten into the habit of doing it this way and it works for me.
Every time I do a fold, I smooth the top and press down a bit.
Et voila! You have a teeny tiny top that’s going to sit in your drawer beautifully. Now Marie says that the clothes should stand up on their own if you were to place them on their side, but the effort of that. My clothes are going to be bet into the drawer and won’t need to be able to stand up at all at all.
Feel free to colour co-ordinate your clothes, or arrange them based on sleeve length or design. Me? Nah.

I find I can fit so much more into drawers and I can see everything. This works well for leggings, jeans, pretty much anything! So if you’re struggling with space when it comes to your clothes, try this out. It might seem like a bit of an effort, but honestly, it takes seconds and it’s really satisfying when it’s done! Have you been tidying, organising, decluttering over the last few weeks?
