Last weekend Joanne and I were like Thelma and Louise driving around the north side trying to find a certain plant of a certain colour. I know, but I had a vision! Anyway, on the drive, we were admiring the changing colours of the leaves and then it hit me, I never did a review of the Naked Heat palette from Urban Decay. I am mucho sorry!
I’m sure you’ve read loads of reviews of this already, seen countless swatches, so I’m not going to waste time doing that. But if you’re on the hunt for a warm toned eyeshadow palette, you’re going to want to check this out. I absolutely love it… Now with the matte shades, they’re soft, buttery, blend effortlessly and there is a small bit of fall out, but nothing too major. If you’re using the darker shades for a look, I’d leave the foundation until after you do your eyes. The shimmery shades are similar enough to keep in with the colour scheme of the palette, but different enough to keep things interesting.
As I don’t have mad MUA skillz, when it comes to palettes, I tend to stick to two general looks and vary them up a bit by changing the colours, but the methods are always the same. So rather than a swatchy review, I thought I’d shake it up a bit, turn back time and do an aul step by step tutorial! In case you’re new here, I’m not a makeup artist, I watch a lot of YouTube videos and know I’m not great at applying it, but if I can do this, so can you. Cue cheesy music with me pointing at you. You can do it!
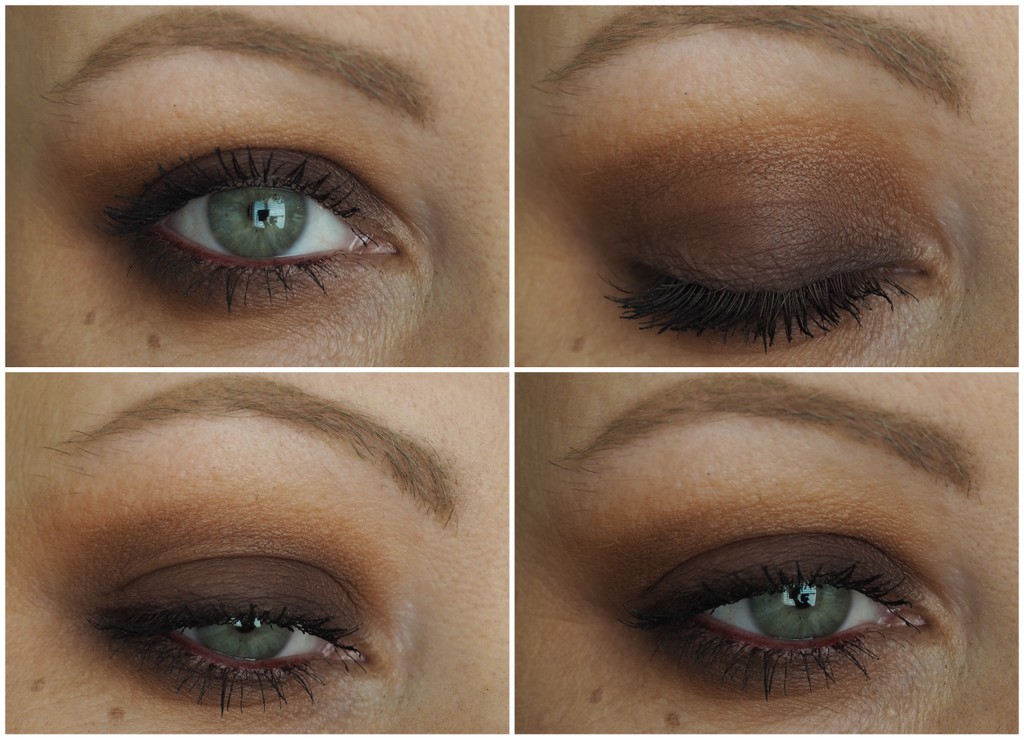
These shades were made for my green eyeballs and I love how each look turned out. I’ve got a daytime look and a nighttime look, but obviously feel free to wear whatever you want whenever you want bridie.

Daytime look

With this look, I always start in the crease but you can start wherever you like! The world is your lobster so you do you boo. For me, starting in the crease means that I don’t have to touch the lid colour later as all of the blending is done beforehand. 1. I started with Sauced and using a fluffy blending brush, I blended out the shade up towards the eyebrow. A transition shade like this doesn’t look like much at this point, but it ties it all together later on. 2. Using a more tapered blending brush, I took the shade Cayenne right into the crease, not buffing it out as much as Sauced. To add a bit more definition to the socket, I applied a couple of layers of this, making sure any harsh edges were blended well.

3. Any of the shimmery shades would work for this next step, but I took Lumbre (mainly because I love the name) and packed it onto the eyelid, not going above the crease. Applying shimmery shades like this with a wet brush will give even more of a metallic look, perfect for a bit more drama! 4. Using a pencil brush, I took the shade En Fuego and applied it in a wedge shape to the outer corner of the eyes. Again, you can pack as much on as you’d like depending on how dramatic you want the finished look to be.

5. I applied En Fuego right under the lower lashes with an angled brush, stamping the shadow rather than blending. 6. I then used Cayenne on a flat eyeshadow brush and blended it under the lower lashes into En Fuego to tie the look together. And that’s it! A soft, easy to wear look that any dirty lookin’ eejit can do.

Nighttime look

I love a dirty big smokey eye at the best of times and this is a really easy technique, applying the shades from darkest to lightest. 1. Using a pencil brush, I packed Ashes on to the upper eyelid, keeping close to the lashes. I blended it out and applied another layer to intensify it even more. 2. I then applied En Fuego to the rest of the eyelid, packing it on. I took this up to the crease and made sure that the blend between it and Ashes was seamless.

3. I took Ashes and En Fuego under the lower lashes, mirroring what I’d done on the upper eyelid. 4. I felt I’d lost a bit of the intensity so applied Ashes to the upper eyelid again because more is more! I made sure to join the shadows together at the outer corners of the eyes.

5. I used a blending brush to apply Cayenne into the crease to warm up the look a bit more and make sure I didn’t look like a panda. 6. If there wasn’t enough makeup on my eyes, I softened the edges of Cayenne with Sauced, blending like a mofo. To finish the look and tie it all together, I applied the 24/7 Glide On liner in Alkaline to the waterline and love how it turned out!

These two looks didn’t take long to do and they’ll take you even less time as you won’t be photographing every step! The Naked Heat palette is a really gorgeous palette that I’ve been getting so much wear out of and is a joy to use. It’s become my favourite of the Naked palettes so far, but saying that, I don’t have Naked 2, so might have to invest so I can make a fully informed decision! The Urban Decay Naked Heat Palette is €47.50 and is on counters nowand has been for ages (sorry!!!) **This post contains affiliate links. You are not charged anything extra and I make a small amount of money if you purchase anything meaning you’ll help me in my dream of becoming Ireland’s Next Top Full Time Blogger, ok, maybe Part Time first!**
